
This guide has been prepared for creators, who are looking to create their first public tour, so you can identify touch points, which prospective customers use to assess whether to take your tour.
We have also included a recommended format to use for tour points.
The best example is to search for and review Ylore tours to view the format.
Selling the tour
You are a tour creator, so let’s sell your tour.
Prospective customers can only see certain elements of the tour. To access tour marker content, a user needs to physically visit the tour points.
In a tour, there are multiple points where a creator can sell the tour. This includes images and text. Highlighted are the touch points that a prospective customer uses to assess whether a tour has value for them.
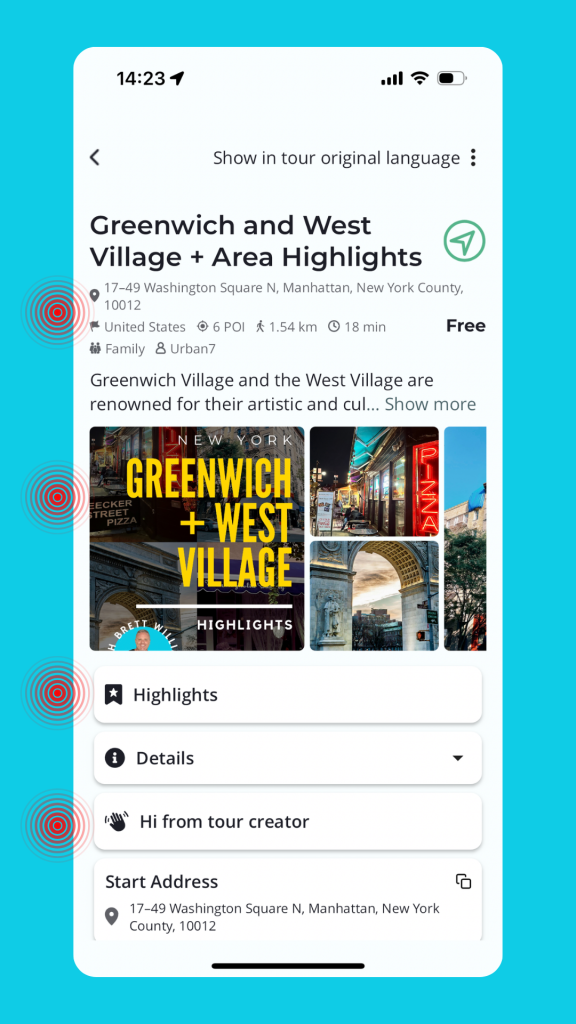
Tour name
Use a tour name that stands out, conveys what the tour is about and is searchable.
Summary details
This details the key points that will influence a tour. How long, how many tour points do they see, mode of transport. This is what you
Summary
Create a captivating summary that engages the customer. You have a 300 character limit.
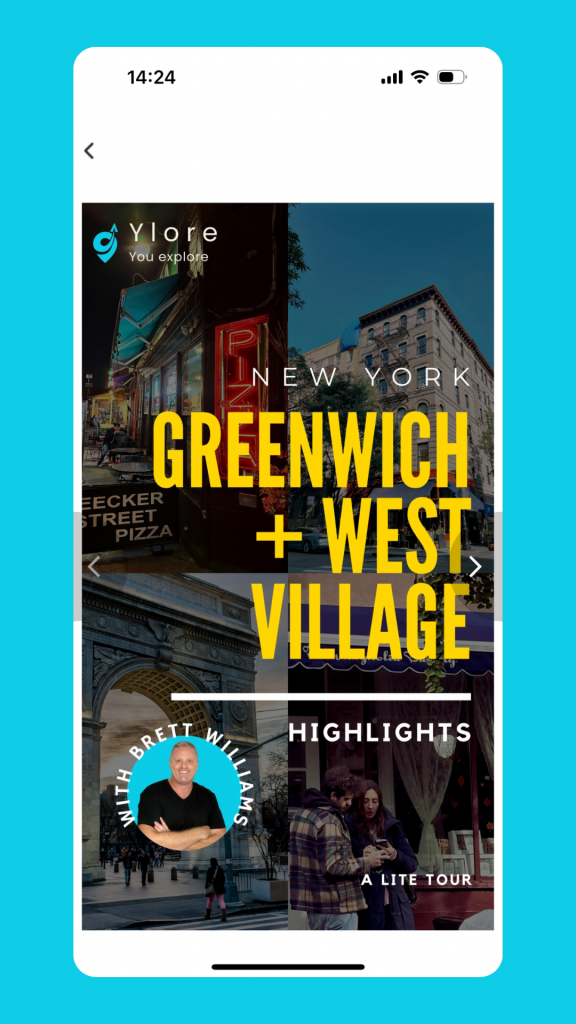
Preview images
This includes photos and video. Show the people what they will be seeing.
This is the template we use at Ylore, for the Highlights section:
Highlights
This is where you detail in depth what a person will see and experience on the tour. Listed is the format that we use on Ylore tours:
Video
Include a video that gives a summary of what a person will see.
Introduce the tour
Include a hook that gets people interested.
Experience
Detail what a user will experience and feel.
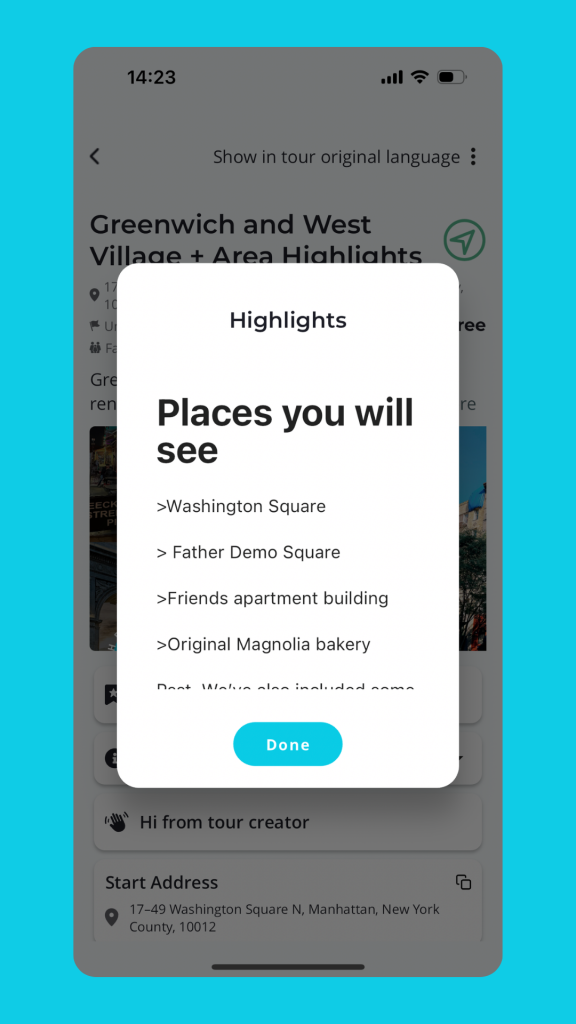
Places you will see
Detail the places a user will see. Keep it short. You may not wish to detail everything, perhaps just the highlights. Its nice to be surprised with great tour points you didn’t expect. Example:
Pssst! We’ve also included Pop Ups, local insights on things to see and do.
So people feel comfortable with self guided tours, we at Ylore give people a quick overview on how easy it is to get started. This is the template we use at Ylore:
Start your adventure
1 Add the tour to your Tours list
2 Reorder the itinerary if you need
3 Select your mode of travel for the tour with walking, bike and vehicle
4 Press Play
Start
The tour start point is nominal. It’s your tour, your way. You can re-order tour points and start close to you. Long press the tour marker and adjust up/down in the itinerary.
End
Tour your way. You can choose to end the tour as per the tour itinerary OR you can delete tour markers that aren’t of interest or don’t fit your time schedule. Simply long press the tour marker.
Inclusions
All sights are free. No additional access tickets are required.
Authentically us
We believe in authenticity. Each tour we have walked and photographed. Got an update? Tell us here (use the external link in the editor).
Still within Highlights, it’s important to to detail to a prospective customer, what is included and excluded in a tour. This is why at Ylore we include how people will get around and highlight things they may need or be aware of. This is the template we use at Ylore:
Getting around
Transport
We create our tours with accessibility in mind. Our goal is to start tours close to public transport. You will need to make payment for any public transport you use.
Comfort
With so much to see, comfort is key. Wear appropriate shoes and dress for the weather.
Safety
Navigating unfamiliar locations can be chaotic. It’s essential to stay safe by always looking both ways before crossing the street and obeying traffic laws.
Travel usually involves crowds, particularly during peak times. Keep calm and carry on.
Include any copyright restrictions. Example:
Copyright AEGIS 24/7 2024. All rights reserved.
Hi from the tour creator
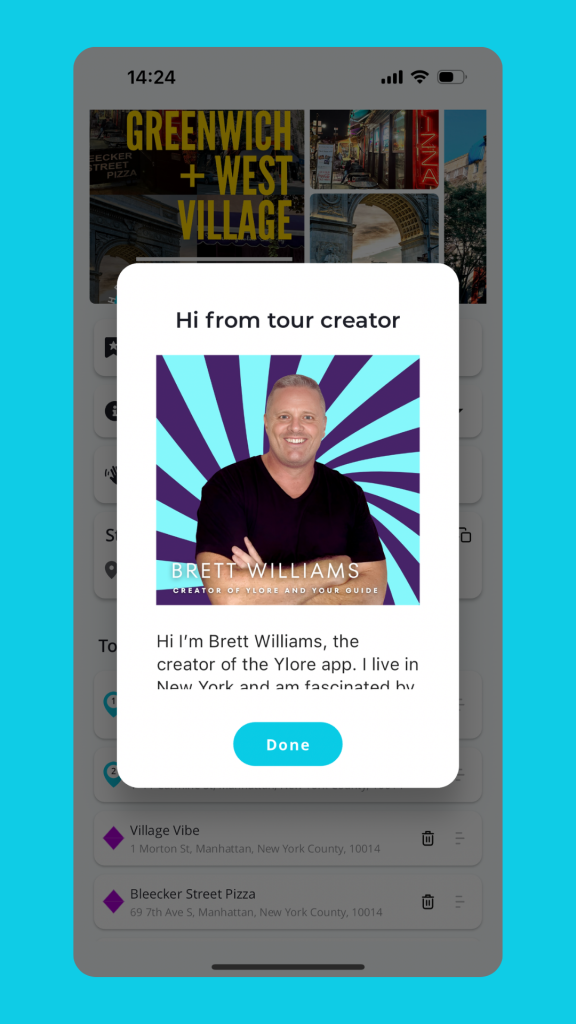
Tell prospective customers who you are and why you are their tour guide of choice.
Include a photograph and any external links people can access to find out more about you.
Tour point content
Image
At Ylore, the content format is fluid, but we start any tour point with an image or video, so it sets the context for what a person will see.
Content
Detail the content in concise paragraph, using headers.
The more spaced out it is, the easier the content is to read.
End of tour
At the end of a tour, preferably using a Tour Point Of Interest, not a Pop Up, thank people for choosing your tour. You can use text or an image to do this.
Things to remember:
Users can reorder or delete, so place the thank you on a POI which is likely not to change, based on factors such as location.
Ask for feedback
Ask people to rate the tour. The more reviews the higher the higher the credibility with people.